『VALORANT』Resolving VAN9001 and VAN9003 Errors on Windows 11
This article explains how to fix the issue where VALORANT, the tactical FPS developed by Riot Games, won't launch on Windows 11.
On October 5, 2021, Microsoft released its latest operating system, Windows 11. Many users who own compatible PCs may have already upgraded to the new OS.
However, due to increased security requirements in Windows 11, VALORANT now requires certain features—Secure Boot and TPM 2.0—to be enabled on your PC. If these are not activated, you may encounter errors such as VAN9001 or VAN9003, preventing the game from launching.
In this article, we’ll introduce the features required to run VALORANT on Windows 11 and walk you through how to enable them. If you’ve updated your OS and are having trouble starting the game, we hope this guide helps you resolve the issue.
Why VALORANT Won’t Launch on Windows 11, like TPM 2.0,Secure Boot Requirements
Reasons
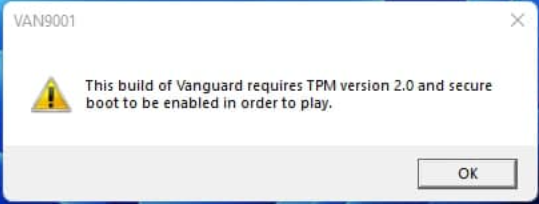
With Windows 11, VALORANT has increased its security requirements and now requires two features—Secure Boot and TPM 2.0—to be enabled. If these features are not activated, the game will crash with an error message like:"This build of Vanguard requires TPM version 2.0 and Secure Boot to be enabled in order to play" along with an error code such as VAN9001 or VAN9003.
Both Secure Boot and TPM 2.0 are security features built into your PC. They help prevent the use of cheat programs, and also allow Riot Games to link hardware IDs to suspicious accounts running such programs, enabling stronger enforcement actions like account bans.
As Windows 11 gaming PCs become more common, these measures may help create a cleaner and more secure gaming environment.
Below, we’ll explain how to enable Secure Boot. We’ll skip instructions for enabling TPM 2.0, as it’s already a requirement for installing Windows 11.
Important notes:
- Secure Boot must be enabled through the BIOS menu, so if you’re unfamiliar or uncomfortable with BIOS settings, this procedure is not recommended.
- Proceed at your own risk—this guide is intended only for users who feel confident managing system settings.
- Also, enabling Secure Boot while CSM (Compatibility Support Module) is turned on may cause issues with your operating system. Make sure your system is in UEFI mode before completing the setup.
Enable Secure Boot from the Motherboard: Fix VAN9001/VAN9003 Errors
Steps to Enable Secure Boot

Below are the steps to enable Secure Boot on motherboards from various manufacturers in order to resolve error codes VAN9001 and VAN9003.
For MSI Motherboards
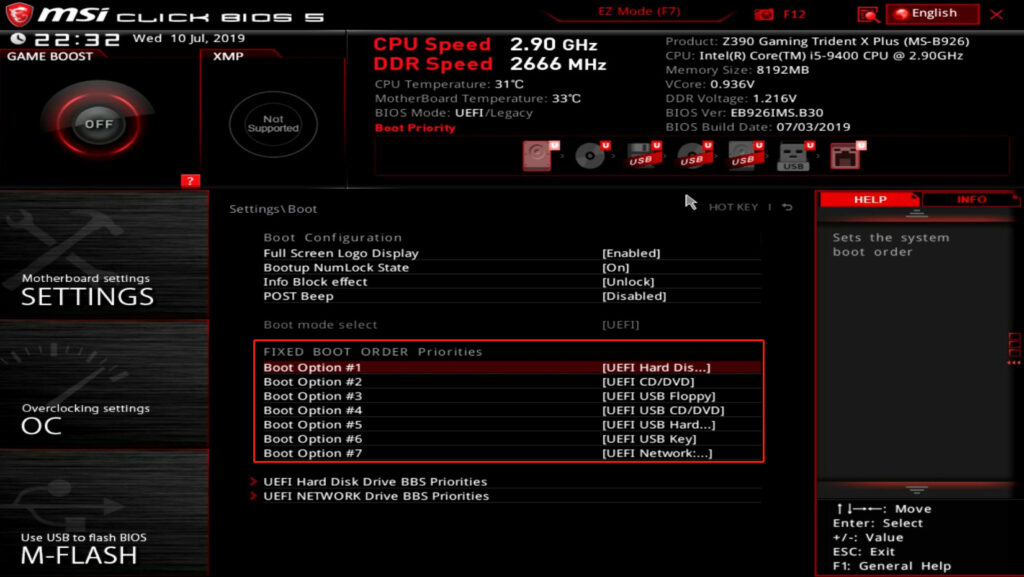
Step 1:
Enter the BIOS, then go to Settings > Advanced > BIOS CSM/UEFI Mode, and change it to UEFI.
Step 2:
Return to Settings > Security > Secure Boot, and select Enroll All Factory Default Keys.
Step 3:
Still under Settings > Security > Secure Boot, change Secure Boot to Enabled.
Step 4:
Press F10 to save and exit. You're done.
For ASUS Motherboards
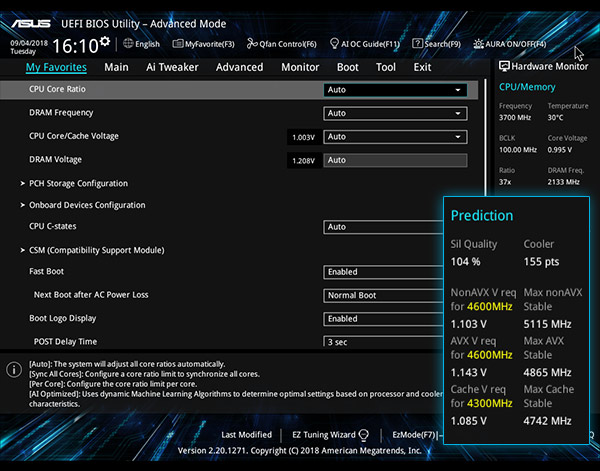
Step 1:
Enter the BIOS, switch to Advanced Mode, then go to Boot > Secure Boot Menu, and set the mode to UEFI.
Step 2:
In the same Secure Boot Menu, change Secure Boot State to Enabled.
Step 3:
Press F10 to save and exit. You're done.
For ASRock Motherboards
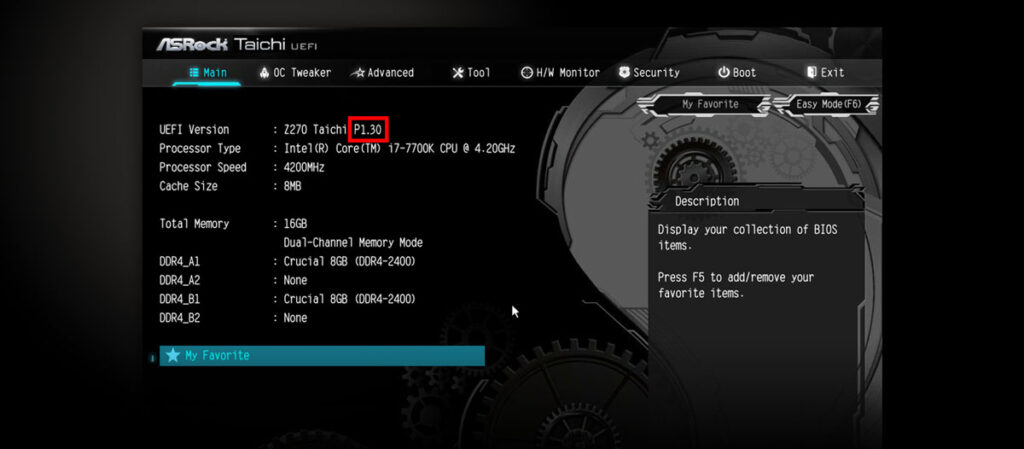
Step 1:
Enter the BIOS, go to Boot, and disable CSM.
Step 2:
Go to Security and enable Secure Boot.
Step 3:
Press F10 to save and exit. You're done.
Check if Secure Boot is enabled
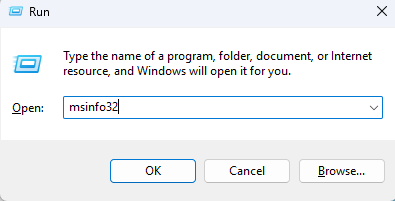
Press Windows key + R to open the Run dialog box, then type msinfo32 and press Enter.


In the System Information window, check the BIOS Mode and Secure Boot State. If they show UEFI and Enabled respectively, the setup is complete. Don’t forget to launch VALORANT afterward to confirm the game runs properly!
That’s all for How to Fix VALORANT Not Launching on Windows 11 like VAN9001 and VAN9003.